Difference between revisions of "Eyenet Camera System"
| Line 32: | Line 32: | ||
<Center>[[File:Eyenet hardware2.png|1020x768px]]</Center> | <Center>[[File:Eyenet hardware2.png|1020x768px]]</Center> | ||
You can similarly switch up the cables to connect the hardware in 3008B with the cameras in any of the other rooms (RR1, RR2, 3008C, 3008D), or just plug the ethernet cables from the 2 boards of 4 cameras straight into the hardware in 3008B (if you want to use the cameras in there). Note that when you plug the cables in, it will take about 30 seconds for the power to start flowing to the cameras and thus for the cameras' feeds to show up in the software: once the yellow light on the left of the PoE board lights up, you should have power to that camera and it should show up in the software. | |||
Revision as of 23:49, 5 December 2012
The eyenet surveillance camera system offers discrete yet high spatial and temporal resolution video recording, and can be controlled both locally and remotely.
installing mx software
install individual camera boards (3 boards x 2 cameras/board = 6 cameras), using the common ip address and unique port, as well as the user name and password
- video source > add
- insert manually > camera
then set up the layout for the 6 cameras in pairs (3 boards)
- layout > new > auto grid
- edit grids
- adjust pixel with, change according to the legend for e.g., panoramic mode, then save
- then drag camera pairs over to open slot on the layout
note: remember to "save configuration" when exiting mx control center
q: can you have only one of the two cameras for a given board in your layout? a: you need to display both if you want to record both
Hardware Setup/Camera Positioning
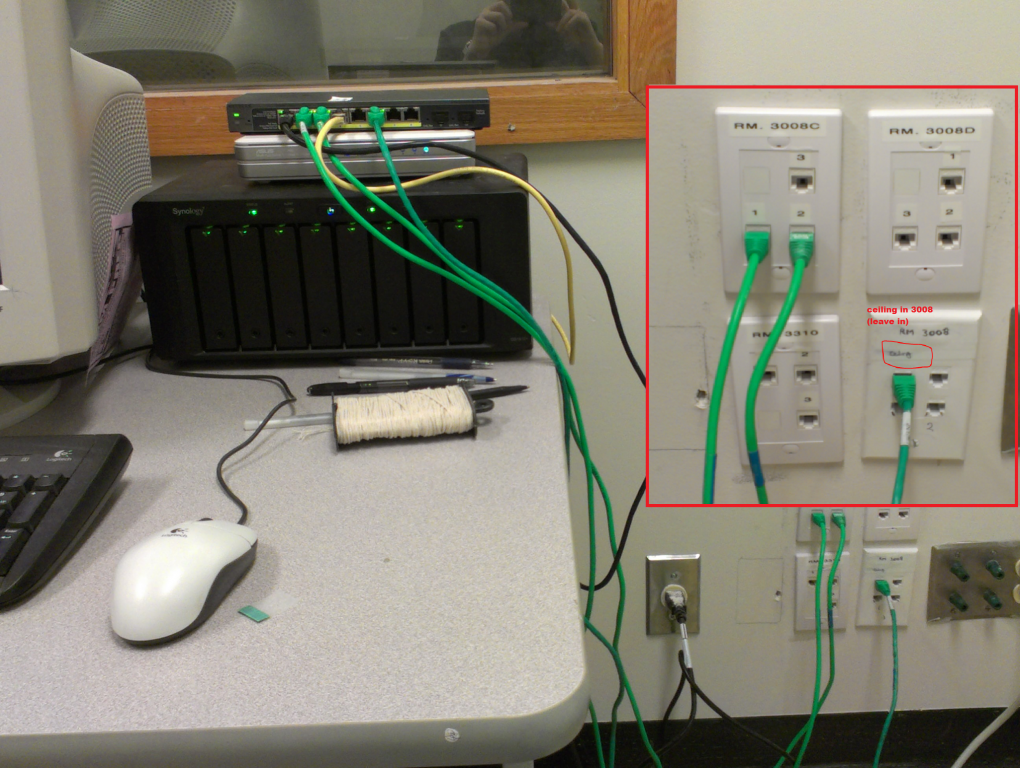
The bulk of the hardware is situated in room 3008B. The 2 ceiling cameras in RR2 are pretty well set in there, but the 2 boards of 4 loose cameras can be easily moved into any of the following rooms: RR1, RR2, 3008B, 3008C, and 3008D. For example, in order to plug the 2 boards (4 cameras) into Room 3008C:
1) In Room 3008B, plug the 2 ethernet cables (not the one for the ceiling cameras in 3008) into slots 1 and 2 in the panel labelled Rm. 3008C:

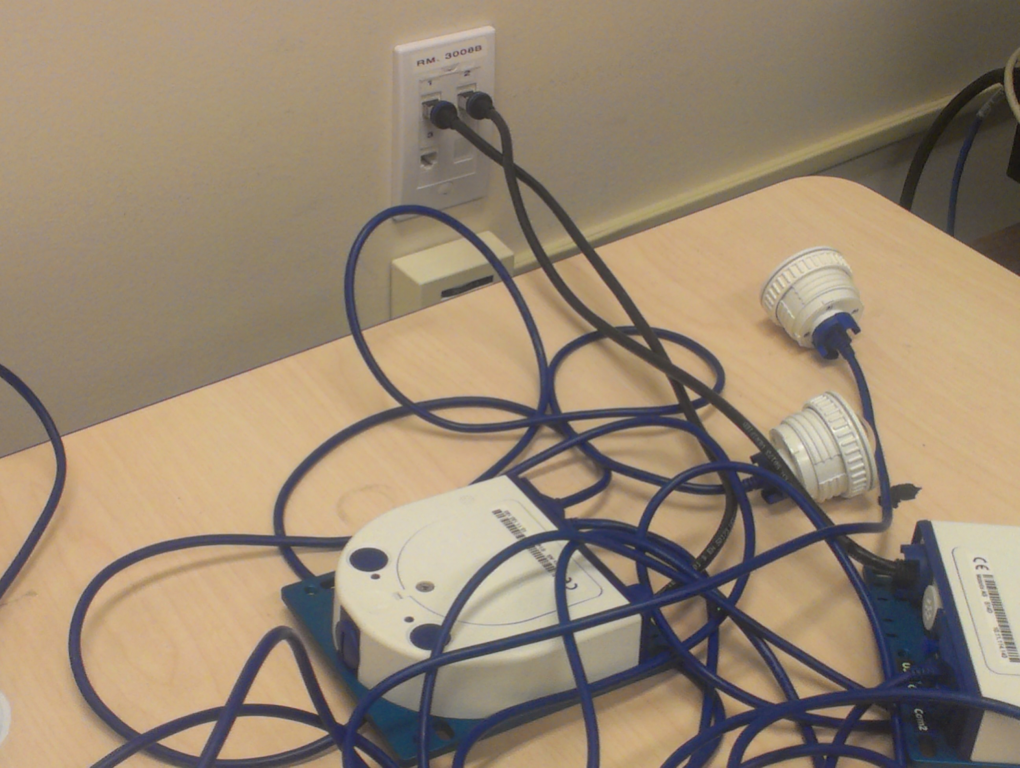
2) Next, in Room 3008C, plug the ethernet cables from the 2 boards into slots 1 and 2 in the panel labelled Rm. 3008B:

You can similarly switch up the cables to connect the hardware in 3008B with the cameras in any of the other rooms (RR1, RR2, 3008C, 3008D), or just plug the ethernet cables from the 2 boards of 4 cameras straight into the hardware in 3008B (if you want to use the cameras in there). Note that when you plug the cables in, it will take about 30 seconds for the power to start flowing to the cameras and thus for the cameras' feeds to show up in the software: once the yellow light on the left of the PoE board lights up, you should have power to that camera and it should show up in the software.
(todo: when the cameras are not in use, they should be placed in the small filing cabinet in room 3008B, near the rest of the hardware).