Difference between revisions of "Dikablis D-Lab"
| Line 20: | Line 20: | ||
To save a D-Lab project, simply click on 'Save Project' next the the 'Open Project' button at the top left of the window. The 'Save Project' button is only enabled if you have already imported your project video into D-Lab. | To save a D-Lab project, simply click on 'Save Project' next the the 'Open Project' button at the top left of the window. The 'Save Project' button is only enabled if you have already imported your project video into D-Lab. | ||
To open a D-Lab project file, simply click on the 'Open Project' button, as seen in the picture below, and select your .dlab project file. | |||
<center>[[File:2342.png|475x303px]]</center> | <center>[[File:2342.png|475x303px]]</center> | ||
Revision as of 22:33, 10 January 2013
D-Lab Basics
Importing Dikablis Video
When first starting a D-lab project, you should first import the dikablis project video. Click on the 'Import Video' button at the top left of the D-Lab window.
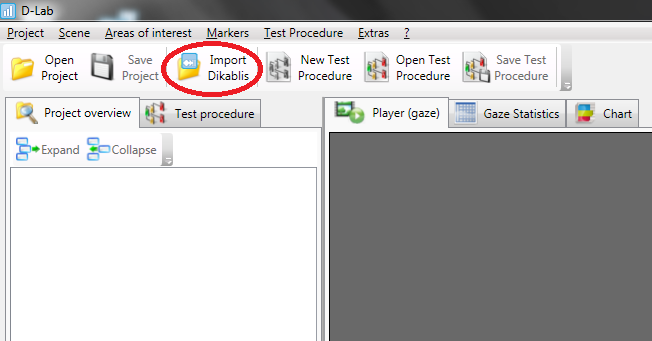
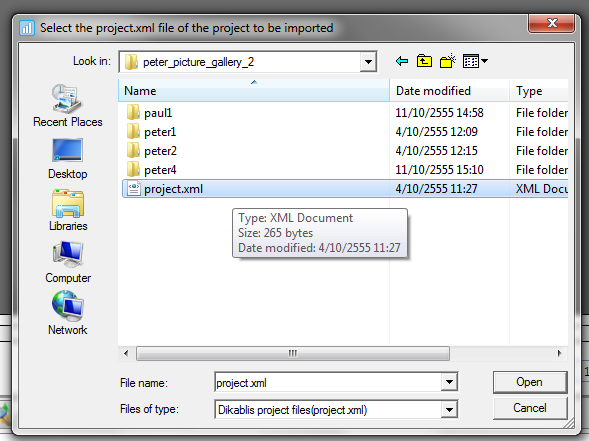
A new window will pop up for you to select the dikablis project XML file. This XML file is in the Recorder project folder for the project video you would like to analyze. Using the window, navigate to the Recorder project folder and select the .xml file for you project.
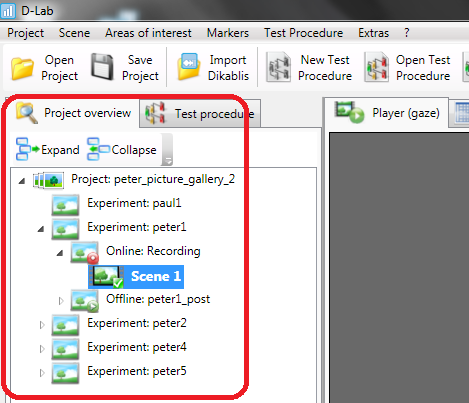
Once the video has been imported, they should appear in the 'Project Overview' tab as seen below. You can now begin analyzing the video. Make sure to save any progress you make with the project.
Saving/Opening a D-Lab Project
Importing video and opening a project are slightly different things. Progress made in the D-Lab project is saved to the D-Lab project file and not the Recorder XML project file. While importing video will bring back the video, only opening a D-Lab project file will bring back any AOIs or test procedures saved to the D-Lab project.
To save a D-Lab project, simply click on 'Save Project' next the the 'Open Project' button at the top left of the window. The 'Save Project' button is only enabled if you have already imported your project video into D-Lab.
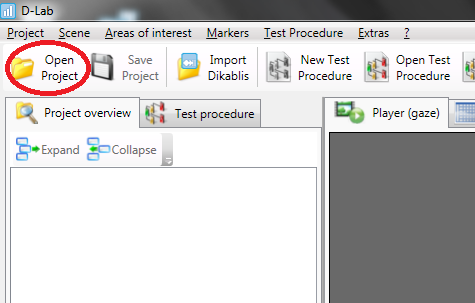
To open a D-Lab project file, simply click on the 'Open Project' button, as seen in the picture below, and select your .dlab project file.
Creating New Conditions
In D-Lab, select the "Test procedure" tab near the top-left. Then press the "New Test Procedure" button at the top as shown,
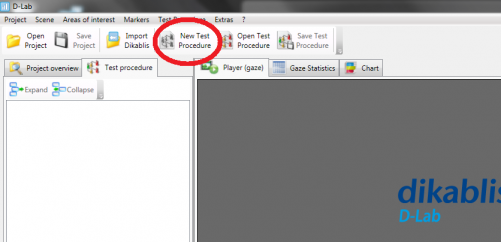
Browse to the folder you would like to save your test procedure in and save the XML file. Once this is done you should see a new condition under the "Test procedure" tab. Right-click the new condition to edit it or create additional conditions or sub(-sub-sub) conditions as shown,
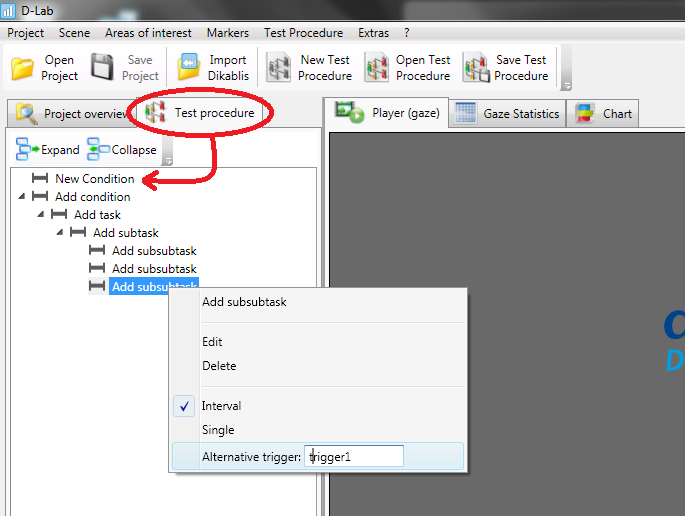
Right-clicking on a condition will allow you to add another condition or sub-condition, edit the name of that condition, delete that condition, set that condition as "Interval" or "Single" and set an "Alternate trigger". If a condition is set to "Interval" you will have to mark the condition twice, once to mark the start and once more to mark the end of the condition. If a condition is set to "Single", the condition only needs to be marked once to mark its occurrence during the experiment. Further markings of a "Single" condition will mark additional occurrences of the condition, not add start or stop times (use interval conditions to mark things that happen over a period of time).
Alternate triggers are used for Remotely Setting Conditions in Control Centre.
After you are done creating the conditions for your experiment, remember to click the "Save Test Procedure" button to save your work!

Setting Within Subject Conditions in D-Lab
It is possible to set within-subject conditions manually, after the each subject's video has been recorded. However it is much easier and less time consuming to remotely set conditions through the D-Lab Control software.
Note that within-subjects conditions are called "Use Cases" in the Dikablis manuals.
Manually Setting Conditions
- after the fact* creating test procedure, (condition vs. task, subtask, etc.): d-lab manual 22/107
Remotely Setting Conditions in Control Centre
in order to remotely set conditions through Control software, you must first create a common test procedure (?).
d-lab manual: 24/107, 98/107
AOIs and Gaze Statistics
-dlab software -import dikablis- select a recording and scene in left panel, can analyze recalibrated files-can add area of interest either for whole project or particular subject, can calculate gaze statistics, e.g., how often/long looked at region -click new, define using left and right clicks, select marks, press ok -compute gaze behaviour